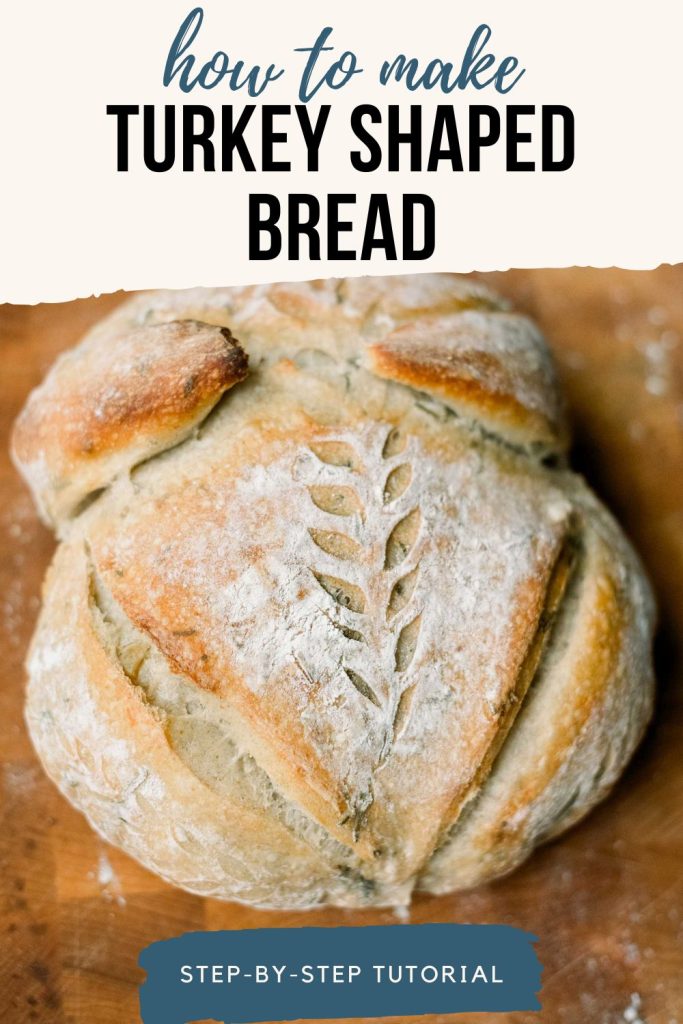
Turkey Shaped Sourdough Bread | Comprehensive Tutorial
It’s November and the one thing on everyone’s mind this time of year is… Christmas! Wait.. I mean… Thanksgiving! While I am 100% one of those people that bring out the Christma decor the moment we come back from trick-or-treating, I believe that there is room in everyones heart for both Christmas AND Thanksgiving. Making a Turkey Shaped Sourdough Bread is one of those really fun ways to get in the spirit of Thanksgiving. Plus, I love the surprised look on my families and neighbors faces when we bring out our sourdough turkey bread!
Quick note: This site contains affiliate links. If you make a purchase, I may earn a small commission (so I can keep cooking and sharing even more recipes!). But only the products I’ve actually tested and love make the cut.
How to make Turkey Shaped Sourdough Bread
Step One: Cold Ferment Your Bread
Make your sourdough loaf and let it cold ferment in the fridge overnight. If you don’t have a sourdough loaf that you love, check out my recipe here for a step-by-step guide to making sourdough. This can also work for yeast breads as well, but making sure it is cold is vital for a nice shaped turkey.
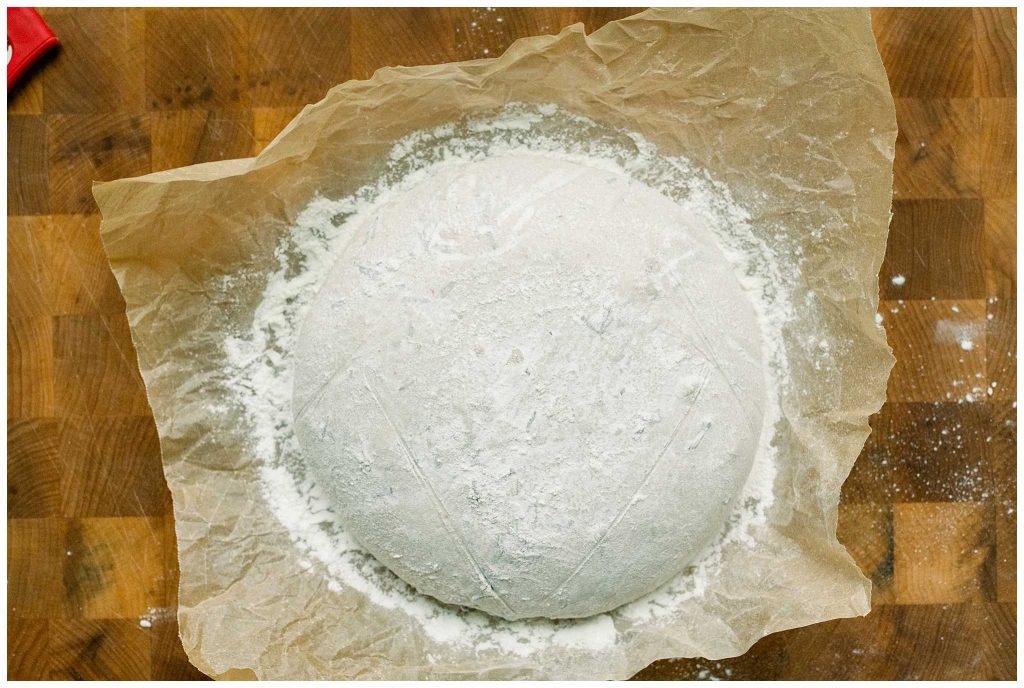
Step Two: Dust With Flour
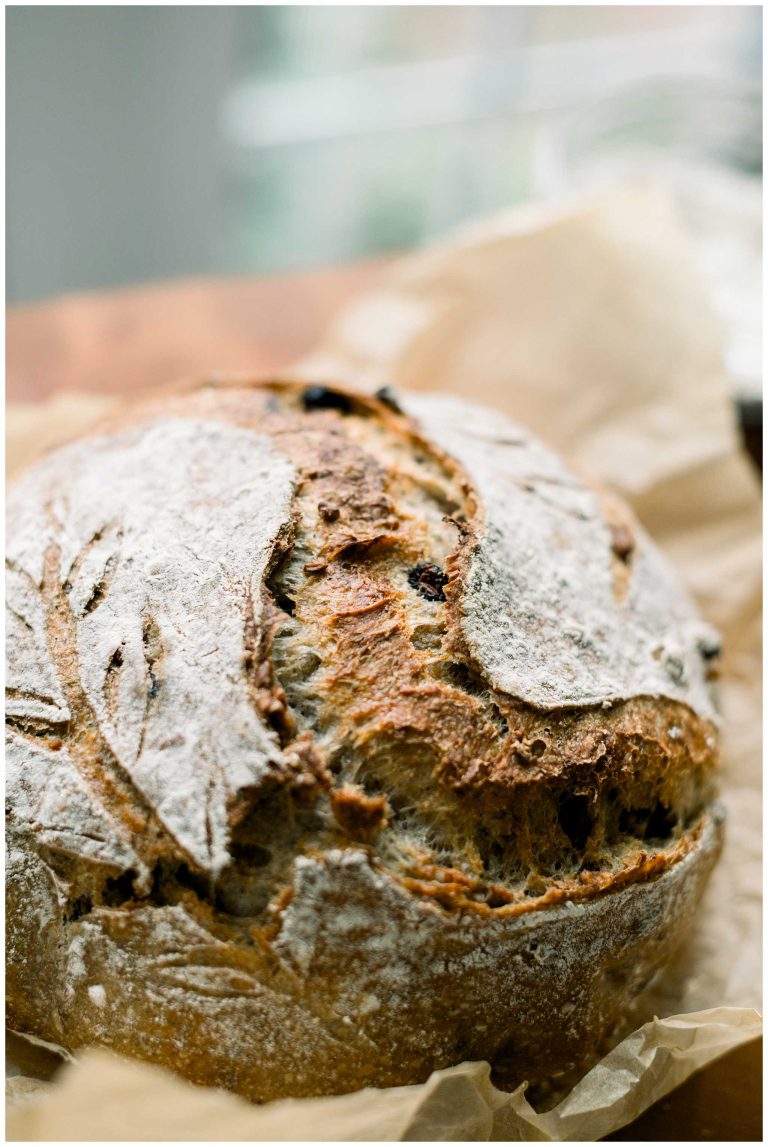
Dusting flour on sourdough before scoring creates contrast, highlighting the design as the dough opens up during baking. It also helps prevent the blade from sticking for cleaner, more precise cuts. All purpose flour works well, but for more contract against the design, rice flour is my go-to.
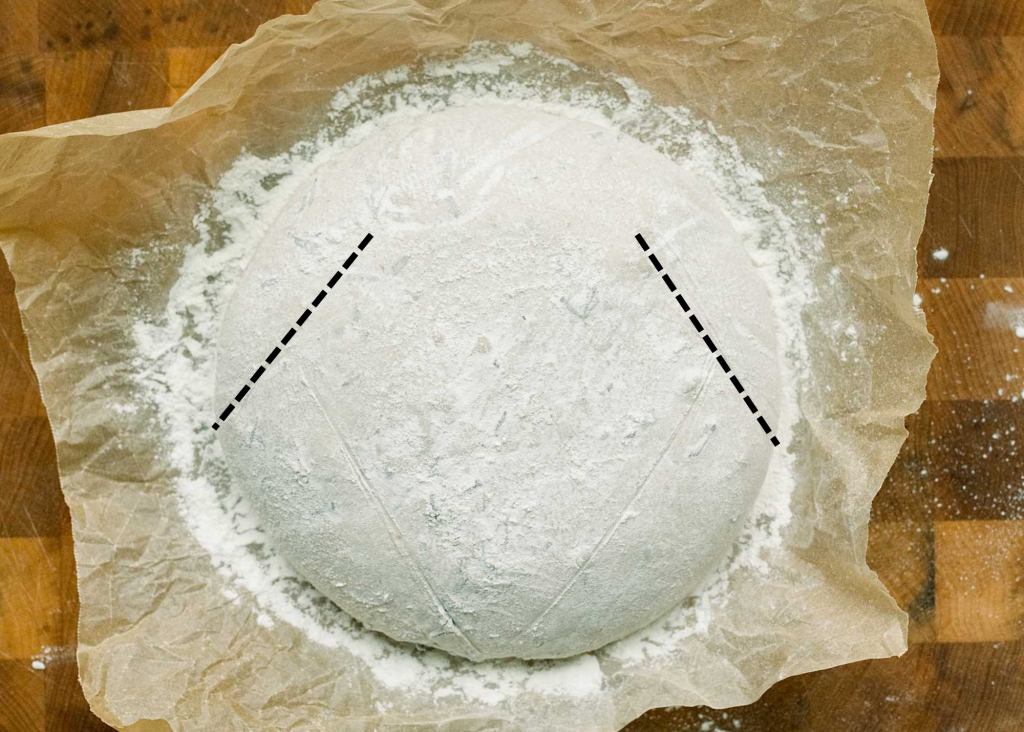
Step Three: Cut The “Wings”
Wings are the next step. You’ll want to leave enough room for the middle section of your bread. This is important so that your bread is still usable for things like slicing and turning into a sandwich or adding jam on top of.
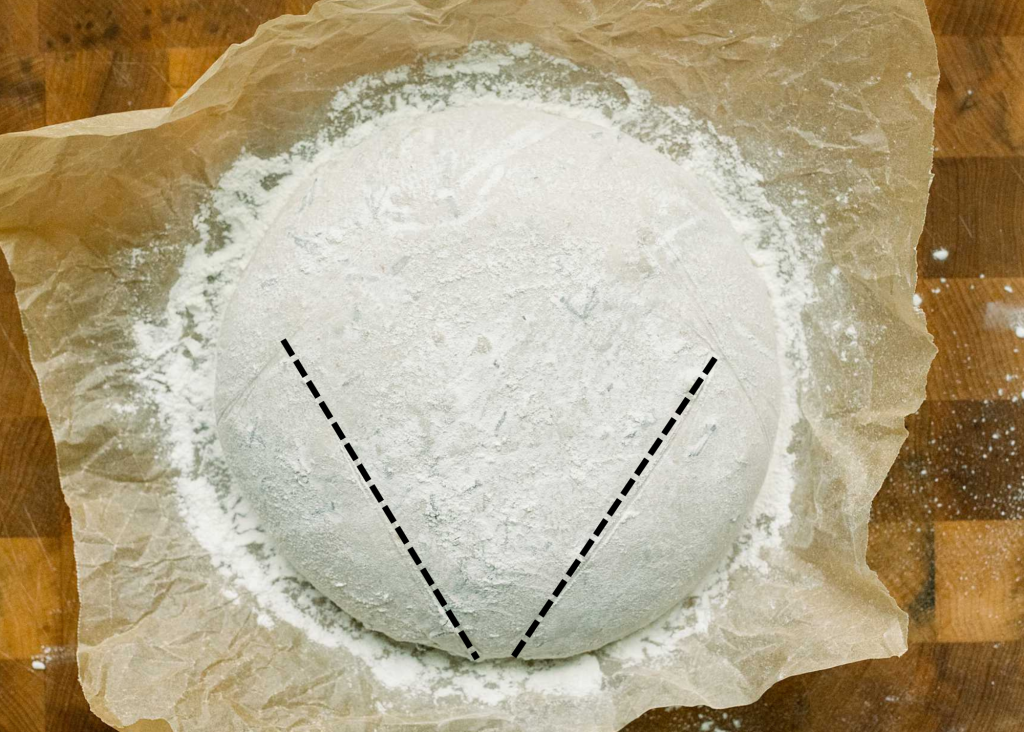
Step Four: Cut The “Legs”
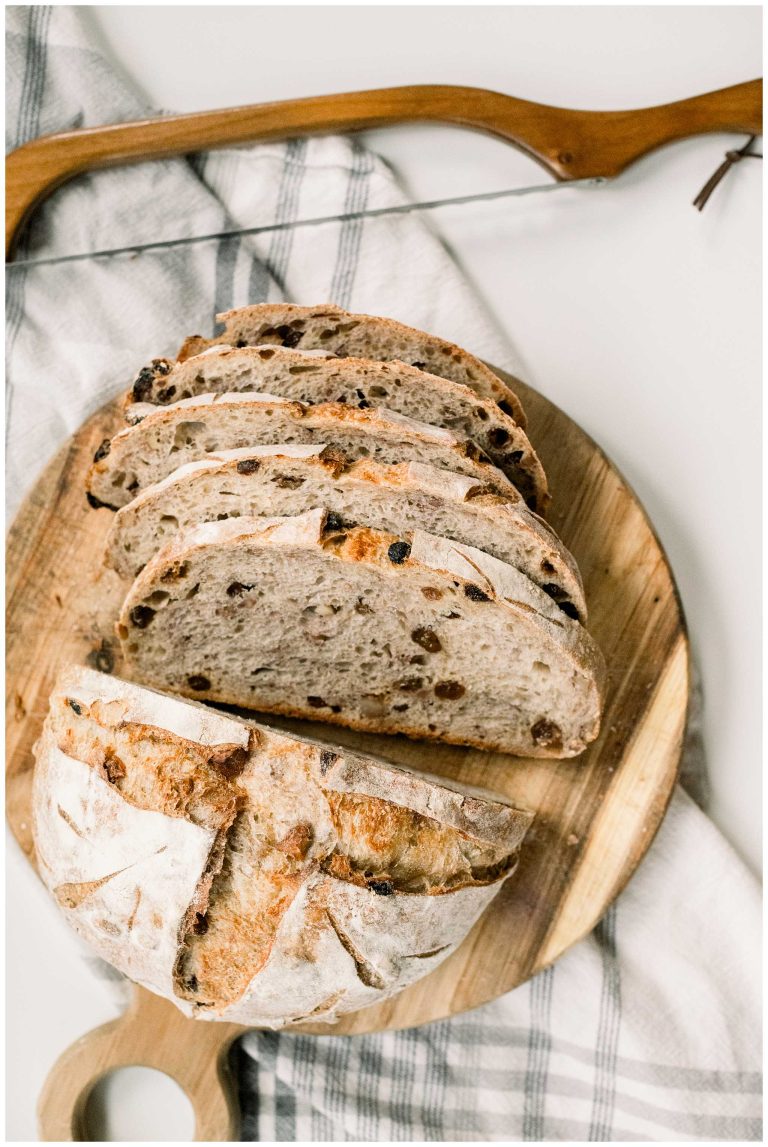
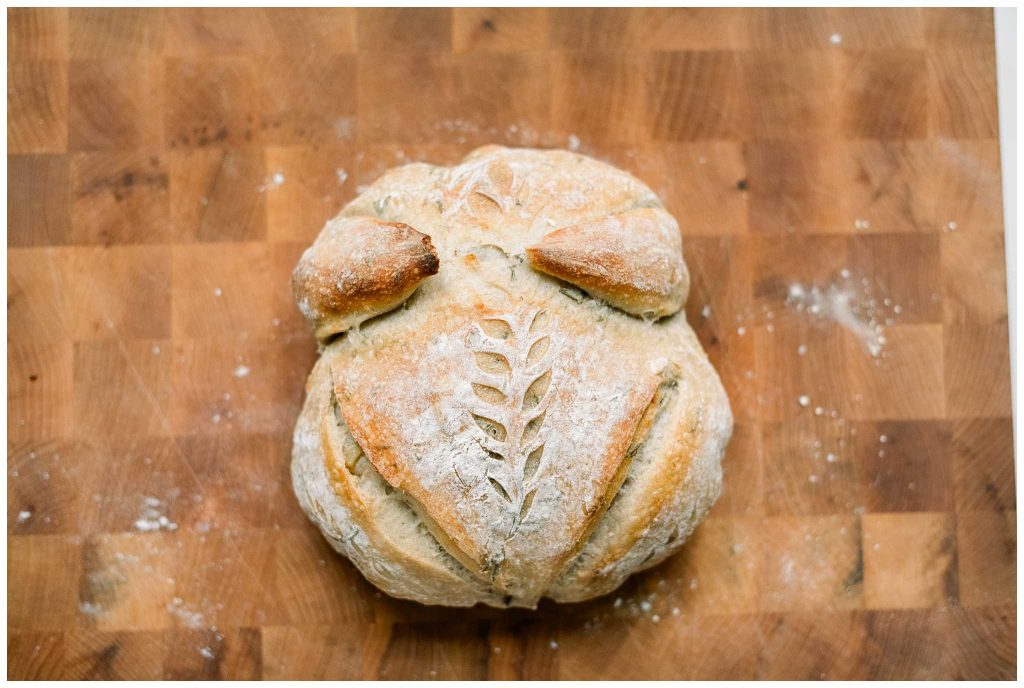
From your wing cut, you will cut down inward to make the legs. I have tried fully seperating the legs and twisting them to create more seperation, but I prefer the finial shape more when all I do is cut all the way down and leave them. As you will see in the final photo, I also stretch the legs just a bit and fold them under the main section.
Step Five: Score a design
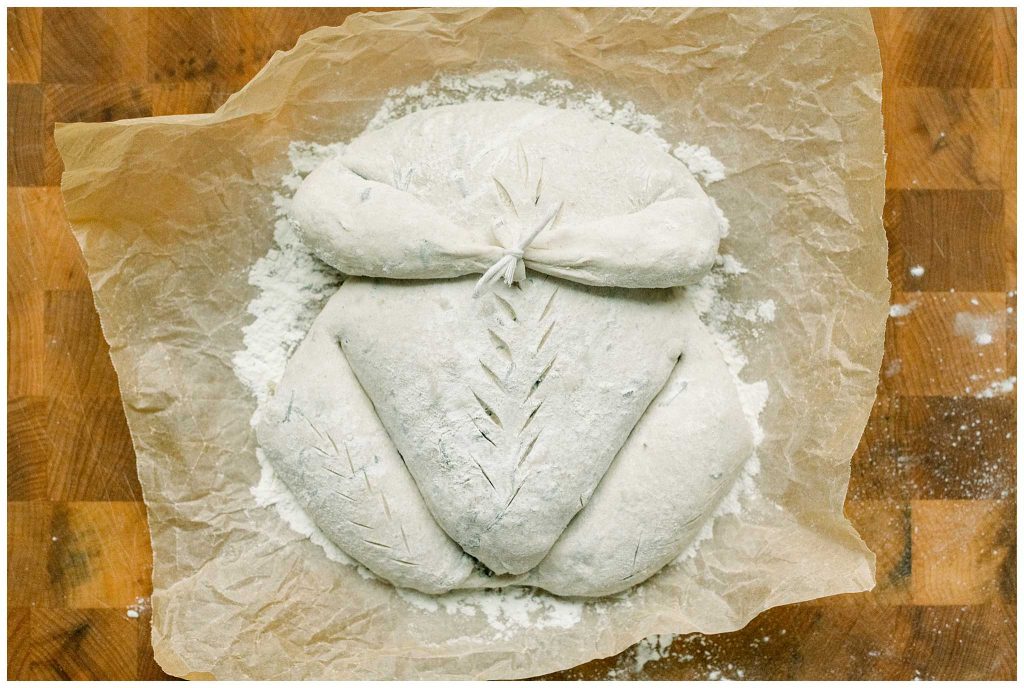
Step Six: Tie Wings Together (Optional)
This step is optional but I like to do it so it ensures most of the wing stays on top of my loaf of bread. If you do not tie it, expect the wings to pop up, which looks fine too!
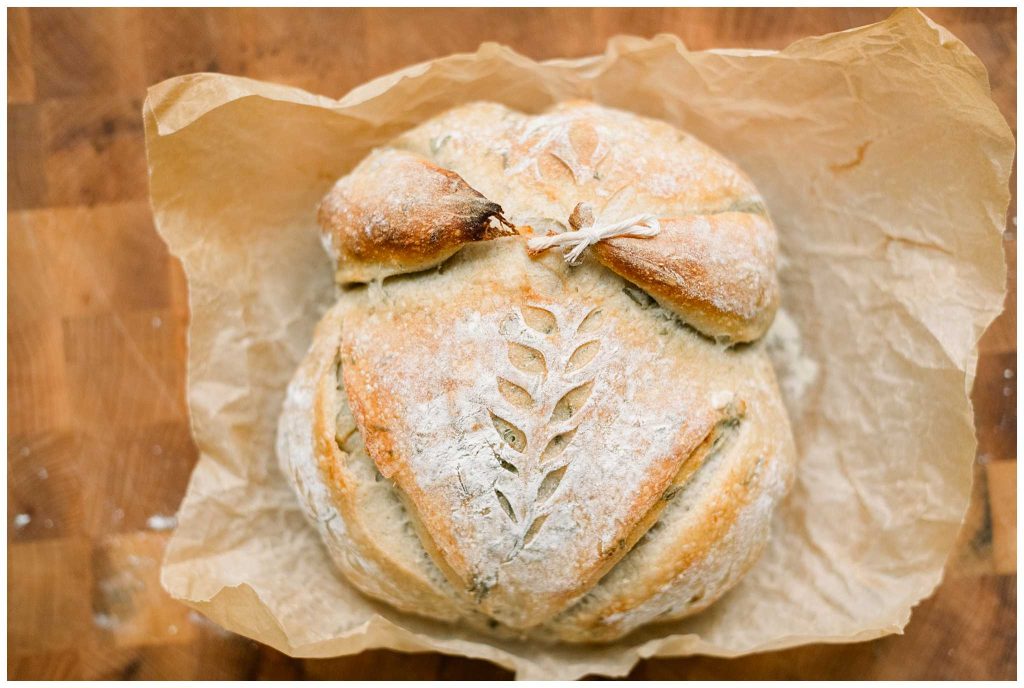
Step Seven: Bake in dutch oven
Every oven is different, so make sure you follow your normal routine for making bread. I bake mine in a 450 degree oven, covered, for 40 minutes.
Tools You Need To Make Turkey Shaped Bread
Bread Scraper
This is what I use to make my large cuts for the wings and the legs. They make fancier ones that I may try out one day, but this thing is going strong 5 years in and I love it!
Bread Lame
A bread lame is essential for the beautiful designs and also making sure the bread doesn’t crack and ruin your design in the oven.
Dutch Oven
I am a huge fan of lodge cast iron, but use whatever you have on hand! I have used enameled with success as well.
Gift Bags (Optional)
If you are using this bread as a gift, I highly recommend these bread bags to gift them in! They keep your bread fresh and make the presentation beautiful 🙂