Sourdough Chocolate Chip Cookies (Freezer Friendly Option!)
Before we dive into these absolutely next level Sourdough Chocolate Chip Cookies, I want to share a bit of a story of encouragement and WHY these cookies are so special to my family. My journey of motherhood and homemaking there is one saying I heard that instantly struck me and has stayed with me for many years.

“Don’t be the thermometer in your home; be the thermostat.”
A thermometer simply reflects the temperature around it, reacting to whatever’s going on. In contrast, a thermostat sets the temperature, it establishes a steady environment rather than responding to outside fluctuations.
This saying hit a nerve for me. As a busy homeschooling mama to four kiddos, I more often felt annoyed by what the day brought than in control of it. I tucked this saying in my heart to remind myself thatI have the unique honor and responsibility to set the temperature for my home.
I remember the first day I began applying this actually. All I did was simply try to smile more. I didn’t think much would come of just that simple act, but I was wrong. My 9 year old daughter immediately noticed. That morning (so not even after a full day!) she said “Wow, I love seeing you smile so much!” That sold it for me right there, from them on I have always strived to be the thermostat.
Quick note: This site contains affiliate links. If you make a purchase, I may earn a small commission (so I can keep cooking and sharing even more recipes!). But only the products I’ve actually tested and love make the cut.
My favorite thing about the classic chocolate chip cookie
You’re probably wondering what this story have to do with chocolate chip cookies? I’ll tell ya! Along with smiling more, there is nothing that brings people spirits up in my home that the smell of fresh baked cookies coming out of the oven. When my family seems to be in a slump, or having a hard day, I love having these sourdough chocolate chip cookies in my freezer and ready to pop in the oven. There is nothing like a cookie and a glass of coffee or tea to bring up the spirits of my husband, a child, or even a friend. It’s become one of my treasured tools in my quest to be a positive thermostat for my home.
Why You’ll Love This Sourdough Chocolate Chip Recipe
Freezer Friendly Recipe
Now that you’ve got the backstory, let’s get to the good part! These sourdough chocolate chip cookies are going to blow you away! They are an easy to follow recipe with included instructions for freezing. I will usually make a double (or triple!) batch so that we have some to enjoy that day and some to put away in the freezer.
Healthy Sourdough Benefits
I love that this recipe allows for the batter to ferment in the fridge. This allows for the sourdough to break down the gluten and make these cookies easier to digest!
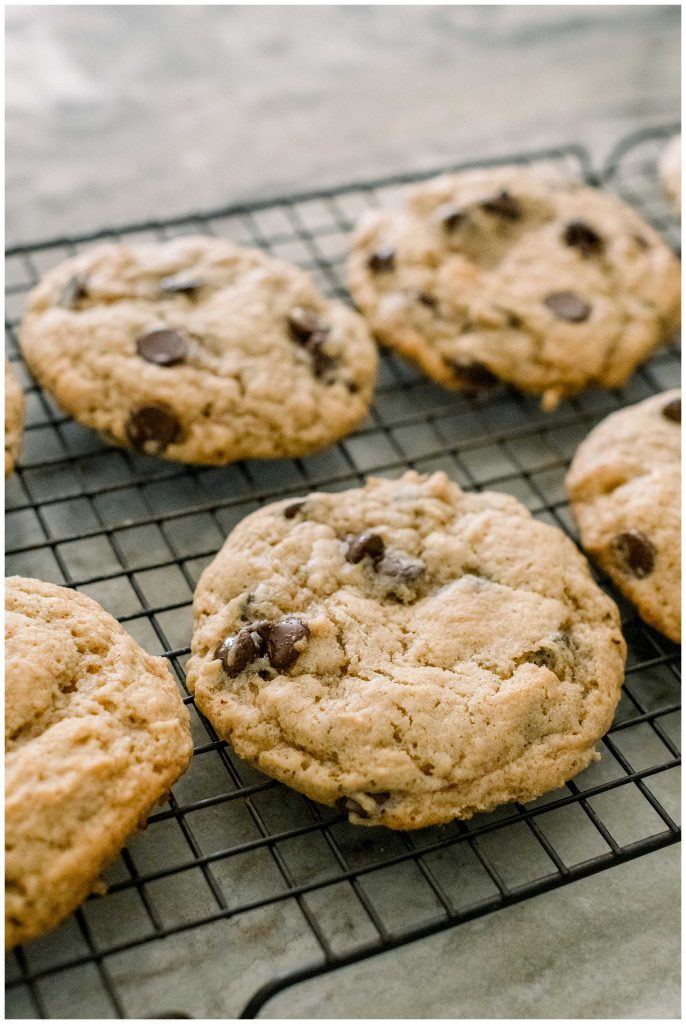
Soft And Chewy Chocolate Chip Cookie
Say no more! I am 100% team chewy cookie over a crunchy cookie! The browned butter in this recipe provides the perfect chew and unique flavor.
Simple and Versatile
Open up my freezer and you will always see a stash of this chocolate chip cookie dough in there. I love doubling this recipe and having it ready to go for an unexpected dinner guest, a surprise treat for the kids, or even just a sweet treat for me!

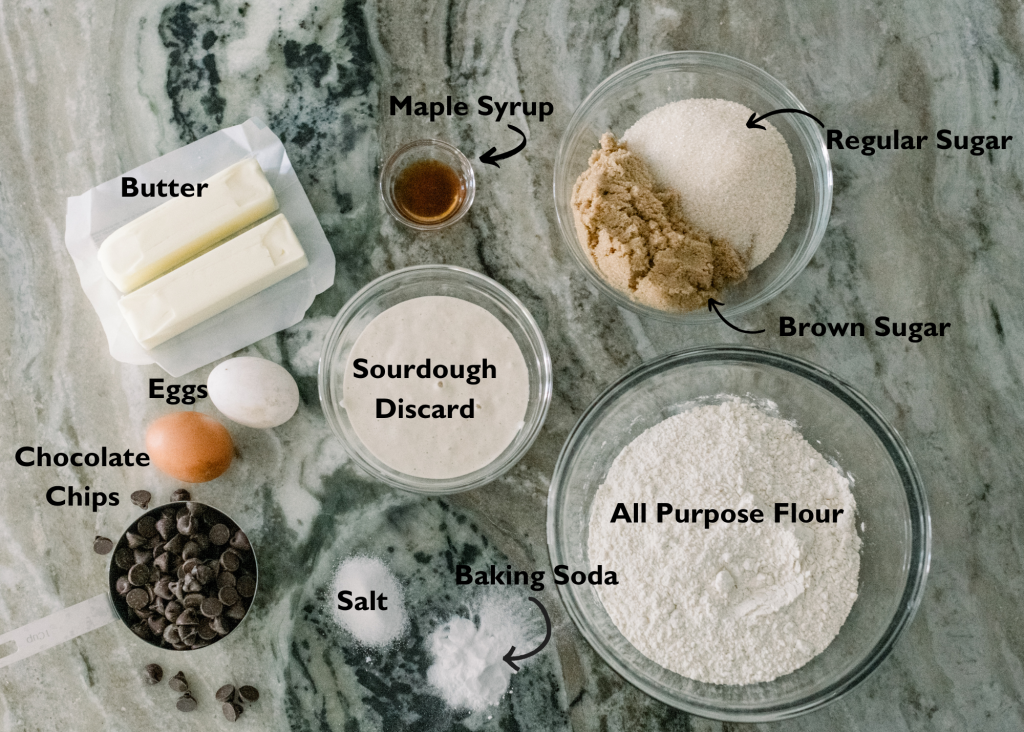
Ingredients for Sourdough Chocolate Chips
Browned Butter
Browning the butter takes these cookies to the next level, adding a deep, nutty flavor that makes each bite unforgettable. Plus, it helps give the cookies a beautiful chewy texture.
Sourdough Starter (hydrated or discard)
Using sourdough starter gives these cookies a subtle tang and makes them easier to digest. Plus, it’s a great way to use up that extra starter!
All-purpose Flour
I keep it simple with all-purpose flour, which creates just the right texture without fuss. No fancy flours needed here—just a pantry staple for perfectly chewy cookies.
Chocolate Chips
What would a chocolate chip cookie be without the chocolate chips? I like to go generous here—there’s no such thing as too many chocolate chips in my book!
This recipe also uses light brown sugar, granulated sugar, eggs, vanilla extract and baking soda
Tools You’ll Need
You probably already have everything you need for this recipe, but I’ll list my go-to tools and some links in case you’re looking to add to your kitchen stash!
Saucepan (for browning butter)
A good-quality saucepan is essential for browning butter evenly. This small step is worth it for the extra flavor it brings. All Clad brand is a bit pricy, but mine still look brand new and work perfectly even after maaaany hours in the kitchen 🙂
Stand Mixer or Hand Mixer
I love using my Kitchen Aid stand mixer to cream the butter and sugar until light and fluffy. A hand mixer works well too, but a stand mixer really makes it easier on the arms for big batches!
Cookie Scoop
For consistent-sized cookies that bake evenly, this cookie scoop set is a game-changer. Plus, it makes portioning out dough super fast.
Baking Sheets
Non-stick or parchment-lined baking sheets give your cookies a perfect golden-brown bottom. I will always sing the praises of nordic ware. They are affordable and great quality. I also love baking cookies on my stone pan. Remember that cooking times need to be adjusted if using a stone (instructions are in the notes of the recipe)
Cooling Rack
A cooling rack helps the cookies cool down quickly and keeps them from over-baking on the hot pan. It’s not essential, but I love the texture it helps preserve.
Food Scale (optional)
If you’re looking for accuracy, a food scale is a baker’s best friend. Measuring ingredients by weight can help you get consistent results, especially with flour! I have one similar to this and use it daily.
Why Use Sourdough in Chocolate Chip Cookies?
Adding sourdough to these cookies gives them a subtle tang and makes them easier to digest. The fermentation process helps break down the gluten, making these cookies a little kinder on your gut. Plus, it’s a great way to use up leftover sourdough discard while baking something extra delicious! If you aren’t on the sourdough train, I have another healthy chocolate chip recipe that uses fresh milled flour.
Freezing Information (Two Methods)
How to Freeze Dough Balls:
- Shape dough into balls and place on a baking sheet to freeze. Once frozen, transfer to a zip-top bag.
- To Bake: Bake straight from frozen at 350°F, adding 2-3 extra minutes as needed.
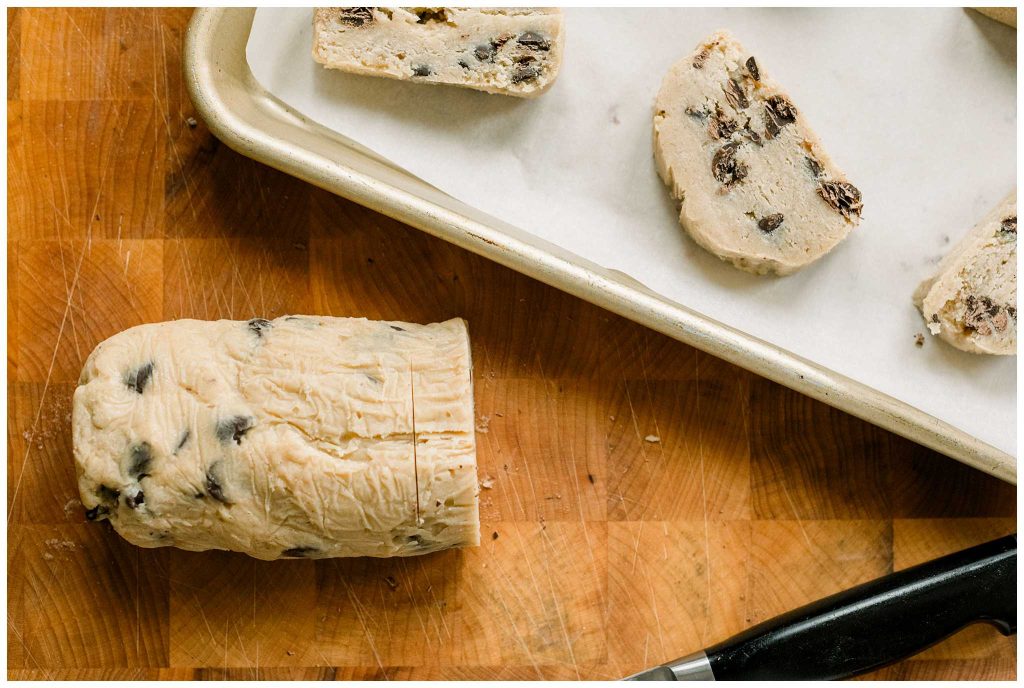
How to Freeze as a Slice-and-Bake Sourdough Cookies:
- Shape dough into a log, wrap tightly, and freeze.
- To Bake: Slice frozen log into ½-inch rounds and bake, adding an extra 1-2 minutes.
Long Fermenting Information
For the best flavor and texture, allow the dough to ferment in the refrigerator for at least 2 hours, or up to 24 hours. This resting time not only enhances the flavor, giving the cookies a deeper, richer taste, but it also helps break down the gluten, making them easier to digest. A little patience goes a long way here, and your taste buds will thank you!
Baking Tips
Cool the Butter Before Mixing It With Sugar
For best results, make sure your butter is completely cooled before mixing it with the sugar. I will get the butter browned and while it is cooling, gather the remaining ingredients. If I am in a rush, I sometimes pop the browned butter in the fridge for 5 to 10 minutes. I have made this recipe using the warm browned butter, but the cookie batter is a bit harder to work with (still tasty results!)
Try Different Mix-Ins
Feel free to get creative with mix-ins! White chocolate, dark chocolate, or even chopped nuts (like walnuts or pecans) add extra texture and flavor. A handful of shredded coconut or dried cranberries can bring a fun twist as well.
Use Sea Salt for a Finishing Touch
After baking, sprinkle a tiny pinch of flaky sea salt on top of each cookie. The salty-sweet combo takes these cookies to the next level!
Use a Stoneware Pan for Even Baking
If you have a stoneware pan, try baking these cookies on it! Stoneware heats slowly and evenly, helping the cookies bake with consistent color and texture. It also retains heat well, which is great for getting that perfectly chewy center with golden edges. Just make sure to preheat the pan along with the oven for the best results.
Rest on the Pan for a Perfect Texture
For the perfect chewy center, let the cookies rest on the baking sheet for a few minutes after removing them from the oven. They’ll continue to firm up a bit as they cool, making them easier to transfer to a cooling rack.
How To Make Sourdough Chocolate Chip Cookies
Brown The Butter
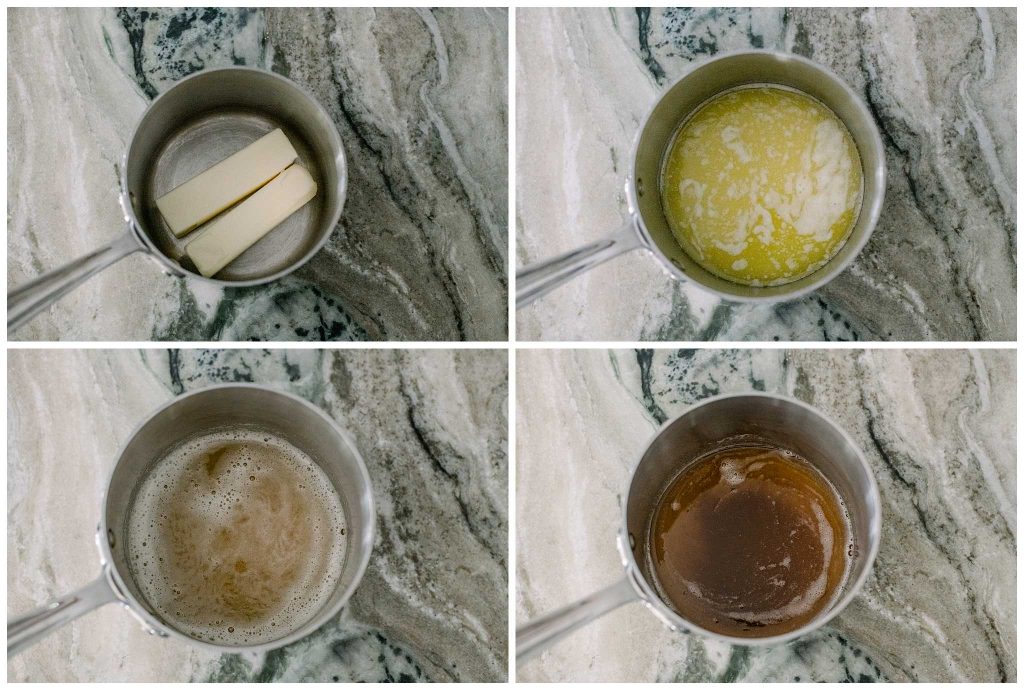
The first step in making these cookies is browning the butter. In a medium saucepan, melt 1 cup of butter over medium heat, stirring occasionally to ensure even melting. As the butter heats up, it will begin to foam and then turn golden brown. You’ll notice a nutty aroma as the milk solids caramelize. Be sure to watch it closely, as it can go from golden to burned quickly. Once it has reached a rich, amber color and you can smell the nutty fragrance, remove it from the heat and let it cool completely. Cooling the butter ensures it doesn’t melt the sugars too quickly when mixing, which could affect the texture of your cookies.
Mix Butter and Sugar
After the butter has cooled, it’s time to cream it with the sugars. In the bowl of a stand mixer fitted with the paddle attachment, combine the cooled browned butter with 1 cup of white sugar and 1 cup of packed brown sugar. Beat on medium speed until the mixture is light and fluffy, about 2–3 minutes. This step is crucial for the texture of the cookies, as creaming the butter and sugars together creates air pockets that will make the cookies light and tender. Scrape down the sides of the bowl occasionally to make sure everything is well incorporated.
Mix Wet Ingredients
Next, add the wet ingredients to the creamed butter and sugar mixture. Crack in 2 eggs, and add 1/2 cup of sourdough discard and 2 teaspoons of vanilla extract. Beat the mixture on low until everything is just combined. The sourdough discard not only adds flavor but also helps the cookies spread and gives them a slight tang that balances the sweetness. Make sure the eggs and sourdough discard are fully mixed into the butter mixture, but be careful not to overmix, as this can affect the final texture of the cookies.
Combine Dry Ingredients
In a separate bowl, whisk together the dry ingredients: 3 cups of all-purpose flour, 1 teaspoon of baking soda, and 1/2 teaspoon of salt. Whisking the dry ingredients together helps evenly distribute the baking soda and salt throughout the flour. This step ensures your cookies rise evenly and have a consistent flavor throughout. Once the dry ingredients are well mixed, it’s time to combine them with the wet ingredients.
Mix the Wet and Dry Ingredients
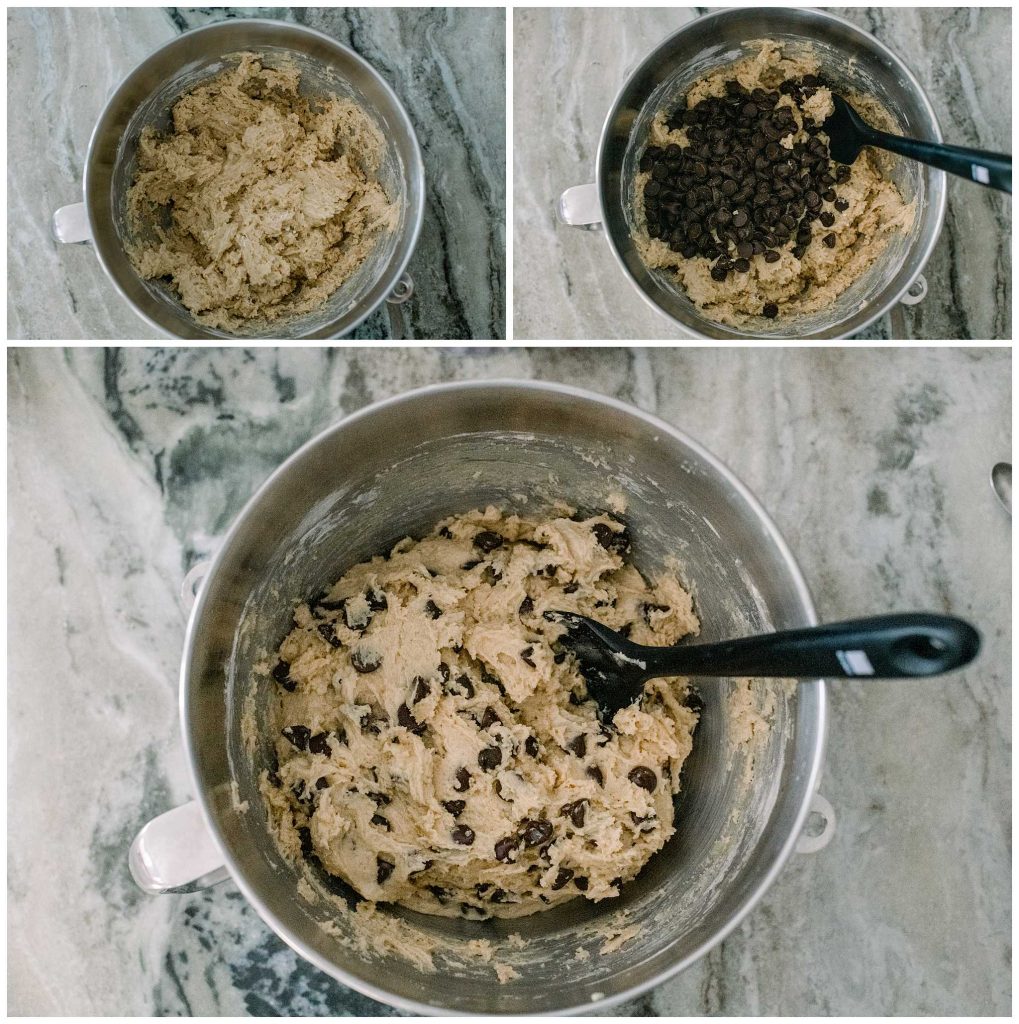
Slowly add the dry ingredients to the wet mixture in the stand mixer, mixing on low speed. This will prevent flour from flying everywhere. Gradually increase the speed to medium as the dry ingredients incorporate, scraping down the sides of the bowl as needed. Mix just until the dough comes together. Be careful not to overmix here, as too much mixing can lead to dense cookies. You want to see a smooth dough with no pockets of flour remaining.
Fold In Chocolate Chips
Once the dough is mixed, it’s time to fold in the chocolate chips. Using a spatula or the mixer on the lowest speed, gently fold in 2 cups of chocolate chips. Make sure they are evenly distributed throughout the dough. You can also add extra mix-ins like chopped nuts or dried fruit if you like, but don’t overmix – just fold until they’re incorporated.
Chill the Dough
Chilling the dough is a key step to ensure the cookies hold their shape while baking, plus they are easier to work with when chilled a bit. Cover the dough with plastic wrap or transfer it to an airtight container and chill it in the refrigerator for at least 1 hour, or up to 2 days. Chilling the dough helps the flavors meld together and prevents the cookies from spreading too much while baking.
Form the Dough Balls
Once the dough has chilled, it’s time to form the cookies. Using a cookie scoop or your hands, portion out about 3 tablespoons of dough per cookie and roll it into a ball. Place the dough balls on a parchment-lined baking sheet, spacing them about 2 inches apart. This gives them enough room to spread without merging together. If you want slightly larger or smaller cookies, feel free to adjust the dough portions, but be mindful of the baking time.
Bake the Cookies
Preheat your oven to 350°F (175°C). When the oven is ready, bake the cookies for 10–12 minutes for small cookies, or 12–14 minutes for larger cookies. The cookies are done when the edges are golden brown, but the centers should still look a little soft. This ensures the cookies are chewy in the middle and crispy on the outside. Keep an eye on them during the last couple of minutes to prevent overbaking.
Cool the Cookies
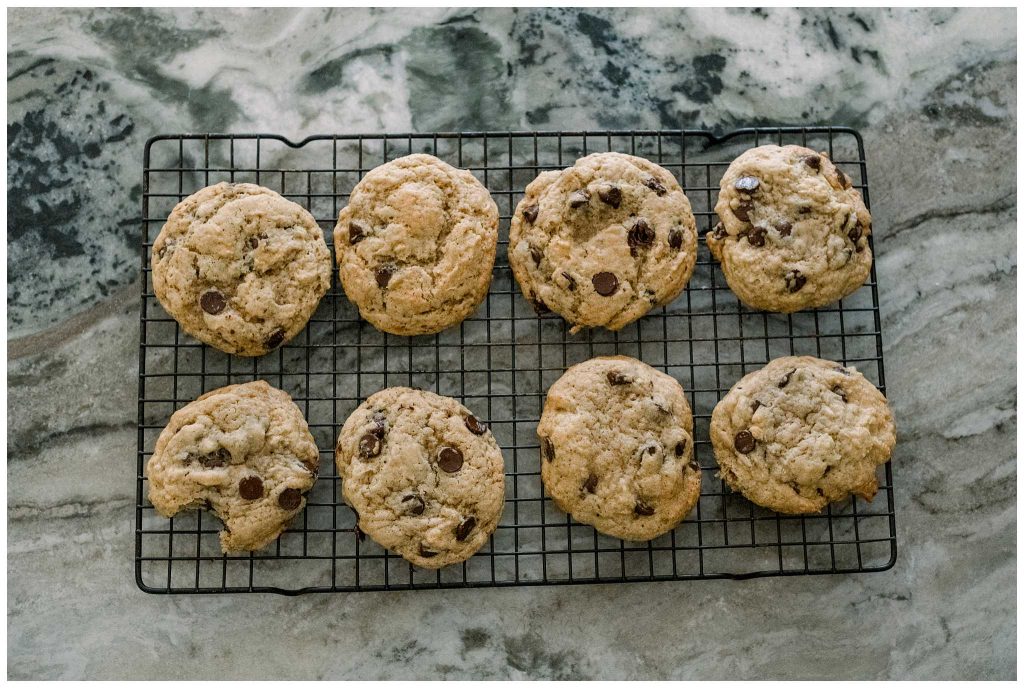
Once the cookies are done baking, remove them from the oven and let them rest on the baking sheet for about 5 minutes. This allows the cookies to firm up and makes them easier to transfer. After 5 minutes, use a spatula to move the cookies to a wire rack to cool completely. If you leave them on the baking sheet for too long, they might become soggy, so don’t skip this step.
Sourdough Chocolate Chip Cookies Recipe
Sourdough Chocolate Chip Cookies (Freezer Friendly!)
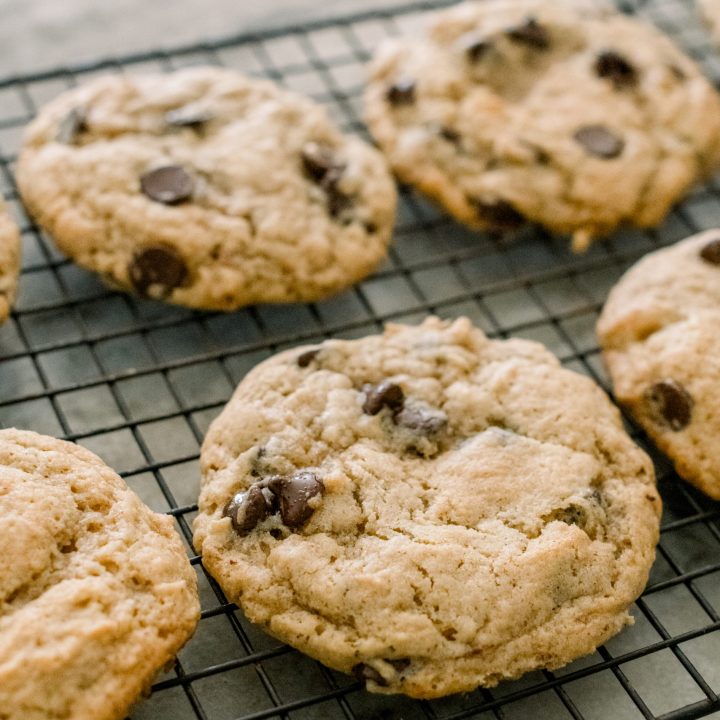
Soft, chewy sourdough chocolate chip cookies with a hint of tang. Perfect for making ahead and freezing for fresh-baked treats anytime!
Ingredients
- 1 cup unsalted butter, 226 g
- 1 cup (200 g) light brown sugar firmly packed
- ⅔ cup (133 g) granulated sugar
- 2 large eggs
- 3/4 cup sourdough discard, 170 g
- 2 teaspoons vanilla extract, 8 g
- 3 cups all-purpose flour, 405 g
- 1 teaspoon baking soda, 6 g
- 1 1/2 teaspoons salt, 7 g
- 2 cups chocolate chips, 340 g
Instructions
- Brown the Butter: In a saucepan, melt the butter over medium heat, stirring occasionally. Continue heating until the butter turns golden brown and has a nutty aroma. Remove from heat and let cool completely before using.
- Cream Sugars and Butter: In a stand mixer with a paddle attachment, combine the browned butter, white sugar, and brown sugar. Beat until light and fluffy.
- Add Wet Ingredients: Add eggs, sourdough discard, and vanilla. Mix until the mixture is light and fluffy.
- Combine Dry Ingredients: In a separate large bowl, whisk together flour, baking soda, and salt.
- Mix Wet and Dry Ingredients: Slowly add the dry ingredients to the wet ingredients, mixing well and scraping down the sides as needed.
- Fold in Chocolate Chips: Gently fold in the chocolate chips.
- Chill Dough: Chill in the refrigerator for at least an hour, or up to 2 days. (If freezing, read below for instructions)
- Form Dough Balls: Using a cookie scoop, form balls with about 3 tablespoons of dough per cookie. Place them 2 inches apart on a parchment-lined cookie sheet.
- Bake: Preheat the oven to 350°F. Bake for 10-12 minutes for small cookies and 12-14 minutes for large cookies, until the edges are golden brown.
- Cool: Remove from the oven and allow to rest for 5 minutes on the baking sheet. Transfer cookies to a wire rack to cool completely.
Freezing Dough for Make-Ahead Option
- After step 6 is complete, scoop the dough into balls using a cookie scoop and place them on a parchment-lined baking sheet.
- Freeze the dough balls for 1-2 hours, or until firm.
- Once firm, transfer the dough balls to an airtight container or freezer bag for long-term storage.
- When ready to bake, place the frozen dough balls on a baking sheet and bake straight from the freezer, adding an extra 1-2 minutes to the bake time.
- For slice-and-bake cookies, shape the dough into a log, wrap in plastic wrap, and freeze. Slice into rounds and bake as needed. If dough is too wet, chill in the fridge for one hour before shaping.
Notes
Baking On A Stoneware Pan: For best results, preheat your stoneware pan along with your oven. Since stoneware heats more slowly, you may need to adjust the baking temperature by reducing it by 10-15°F or shortening the bake time slightly. This ensures even baking and a perfectly chewy cookie texture with golden edges.
Nutrition Information:
Yield:
24Serving Size:
1Amount Per Serving: Calories: 241Total Fat: 13gSaturated Fat: 7gTrans Fat: 0gUnsaturated Fat: 4gCholesterol: 36mgSodium: 291mgCarbohydrates: 30gFiber: 1gSugar: 13gProtein: 4g
Nutrition information is an estimate and may vary based on ingredient brands, portion sizes, and preparation methods. Please consult a healthcare professional for specific dietary needs.
