Make Thick Instant Pot Yogurt | A Step-By-Step Guide
If you’re a fan of yogurt and own an Instant Pot, making your own homemade yogurt is a game-changer. Not only is it easy, but it also allows you to control the ingredients and customize the flavor to your liking. In this post, we’ll walk you through how to make thick Instant Pot Yogurt, including the tools you’ll need, tips for success, and answers to frequently asked questions.

Why You Will Love This Recipe
Homemade yogurt is a healthier, more affordable, and more eco-friendly alternative to store-bought yogurt. Plus, it tastes amazing! By making your own yogurt, you’ll avoid the added sugars and preservatives found in many commercial yogurts and be able to add your favorite fruits, sweeteners, or toppings.
Health Benefits of Yogurt
Yogurt is packed with protein, probiotics, and other essential nutrients that can benefit your gut health, immune system, and overall well-being. Some of the potential health benefits of yogurt include improved digestion, reduced inflammation, stronger bones, and a lower risk of chronic diseases.
Environmental Benefits of Making Your Own Instant Pot Yogurt
By making your own yogurt, you’ll reduce the amount of plastic waste generated by single-use yogurt containers. Additionally, you’ll be able to control the quality of ingredients used in your yogurt and reduce your carbon footprint by avoiding long-distance transportation.
Tools You Need

Instant Pot with a Yogurt Setting
To make Instant Pot yogurt, you’ll need an Instant Pot with a yogurt function. The yogurt function allows you to incubate the yogurt at a consistent temperature for several hours, ensuring a thick and creamy texture.
Thermometer
A thermometer is crucial for making yogurt because it allows you to monitor the temperature of the milk. A digital or instant-read thermometer works best for this purpose.
Yogurt Strainer
While a strainer isn’t 100% needed to make yogurt, your yogurt will be very thin without it. I only strain my yogurt when we are using it to make parfaits or similar. If you’re only making yogurt to add to smoothies, I suggest not straining it. HERE is the strainer I have been using for over a year and love.
Ingredients

1 Gallon Whole Milk
Whole milk yields the creamiest yogurt because it contains a higher fat content. If you prefer a lower-fat yogurt, you can use skim or low-fat milk, but the texture may be slightly thinner.
1/2 Cup Plain Yogurt
If you already have a heirloom yogurt culture, or got one from a friend, then follow this recipe to a t.
Yogurt Cultures
If you are starting from a purchased yogurt culture like THIS ONE, then follow the package directions first, and then you can make instant pot yogurt using this recipe after that.

Add-Ins (Optional)
This is always the fun part! Make sure to reserve a 1/2 cup for your future batch of yogurt. I have flavor options below to give you some inspiration.
Tips
Don’t Use Ultra-Pasteurized Milk
Ultra-pasteurized (UHT) milk is not ideal for making yogurt because the high-temperature treatment it undergoes can damage the proteins and other components in the milk that are necessary for yogurt-making.
Incubate the Yogurt for at Least 8 Hours
For best results, incubate the yogurt for at least 8 hours at a consistent temperature of around 110°F. Longer incubation times may result in a tangier flavor and a thicker texture.
Let the yogurt cool in the pot in the fridge
This is a great tip if you don’t plan on straining the yogurt. Letting cool in the pot firms it up a bit. Skip this step if you plan on straining.
FAQ
How long does homemade yogurt last?
Homemade yogurt can be stored in the refrigerator for up to two weeks. The cultures begin to get weaker after one week, so you have to make your next batch during that time.
Can I use non-dairy milk to make yogurt?
Yes, you can use non-dairy milk such as soy milk, almond milk, or coconut milk to make yogurt. However, the texture may be slightly thinner than dairy-based yogurt.
Can I use store-bought yogurt to make instant pot yogurt?
Yes, you can! However, heirloom cultures are more resilient compared to store-bought cultures. This means they can ferment milk more effectively, leading to a thicker and creamier texture. Also, heirloom cultures can be reused indefinitely, as long as they are properly cared for. Because cultures from storebought yogurt were meant to be used once (they are direct-set), they are much weaker and can only create a batch or 2 of yogurt.
What is the difference between direct-set and heirloom yogurt cultures?
Direct-set cultures are single-use cultures that are designed to be used once and then discarded. They typically contain a few specific strains of bacteria that are optimized for making yogurt quickly and reliably. Heirloom cultures, on the other hand, are reusable cultures that have been passed down from generation to generation.
The main difference between direct-set and heirloom cultures is that direct-set cultures are designed for convenience and consistency, while heirloom cultures offer more variety and the ability to create a unique and personalized yogurt culture over time.
Does Making Your Own Instant Pot Yogurt Save Money?
For where I live, yes! I will break it down for you based on what yogurt costs at this time locally for me. Right now I can buy whole milk yogurt for $4.46 for 32 ounces.
Cost to make your own yogurt:
- $5.00 for one gallon of milk
- $.095 for electricity
- Total: $5.95 for ____ ounces
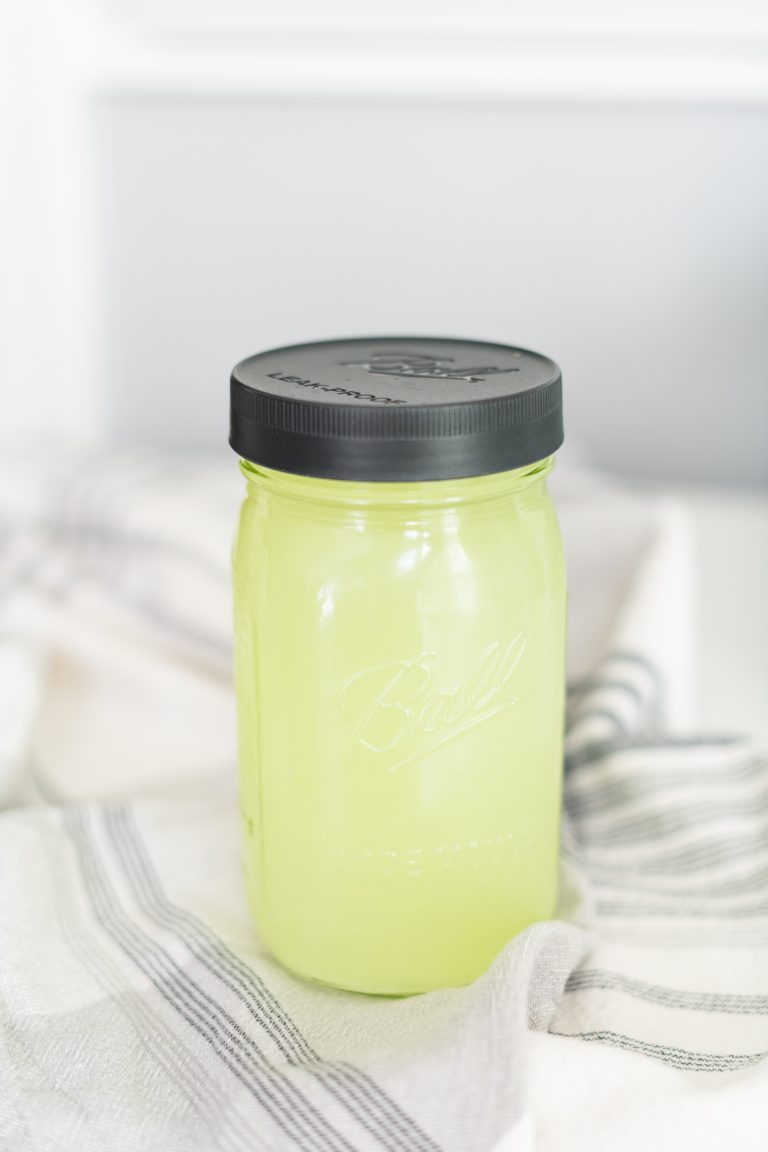
How can I use up Whey?

- Add it to smoothies or protein shakes: Whey is a good source of protein and can be used as a base for smoothies or protein shakes. Just blend it with your favorite fruits, vegetables, and other ingredients.
- Use it in baking: Whey can be used in baking recipes that call for milk or water. It can add extra moisture and a slightly tangy flavor to baked goods like bread, muffins, and pancakes.
- Make a marinade or brine: Whey can be used as a base for marinades or brines for meat or vegetables. The acidity in whey helps to tenderize meat and adds flavor.
- Feed it to pets or farm animals: If you have pets or farm animals, they can benefit from the protein and nutrients in whey. Just make sure to give it to them in moderation.
- Use it as a fertilizer: Whey is rich in nutrients like nitrogen and phosphorus, which makes it a good fertilizer for plants. Dilute it with water and use it to water your plants.

Flavors and Variations
Once you make your instant pot yogurt, the fun can begin! Below I listed some delicious add ins to give you inspiration. But the sky is the limit! So get creative. Just be sure to reserve a half cup of unsweetened, unflavored yogurt to create your next batch.

Fruit – Add fresh or frozen fruit to your yogurt for a sweet and fruity taste. Popular options include strawberries, blueberries, raspberries, peaches, and mango.
Honey – Drizzle some honey over your yogurt for a touch of sweetness. You can also stir in honey to distribute it evenly throughout the yogurt.
Granola – Top your yogurt with crunchy granola for added texture and flavor. You can make your own granola or use store-bought.
Vanilla extract – Add a few drops of vanilla extract to your yogurt for a hint of vanilla flavor.
Spices – Add spices like cinnamon, nutmeg, or cardamom to your yogurt for a warm, comforting flavor.
Chocolate – Stir in some cocoa powder or chocolate chips for a chocolatey treat.
Savory – You can add herbs like dill or parsley to your yogurt, or even mix in some chopped veggies like cucumber or tomato. We also love using a dollop of thick instant pot yogurt when we make tacos, chili, or anything that uses sour cream.
How to Make Instant Pot Yogurt
Pour 1 gallon of whole milk into the Instant Pot.

Press the “Yogurt” button and then press “Adjust” until the display reads “Boil.”
Heat the milk, stirring occasionally, until the Instant Pot beeps and turns off.
Remove the inner pot from the Instant Pot and let the milk cool to 110°F.

Add the yogurt to the Instant Pot and stir gently to combine.
Press the “Yogurt” button and adjust the time to 8 hours (or up to 24 hours longer for a tangier flavor and thicker texture).

After the incubation period, remove the inner pot and place it in the refrigerator to chill for 8 hours. (Optional)

Strain the yogurt through a cheesecloth or fine-mesh sieve like mine to remove the whey and achieve a thicker texture.

Cool in a fridge, then serve the yogurt with your favorite toppings or mix-ins.


